
Create Your First Signature Profile
Updated 9/8/20262 min read
Click the purple "+" (Add Pfx) button on the Signatures list page, then fill out the Create Your AI Signature form—enter a title, optionally set a file password, choose a signature type (e.g., "Search by Text"), specify the PDF text your signature should anchor to (e.g., "Authorized"), and upload your .PFX certificate file (max 10MB). Click Update Signature to save.
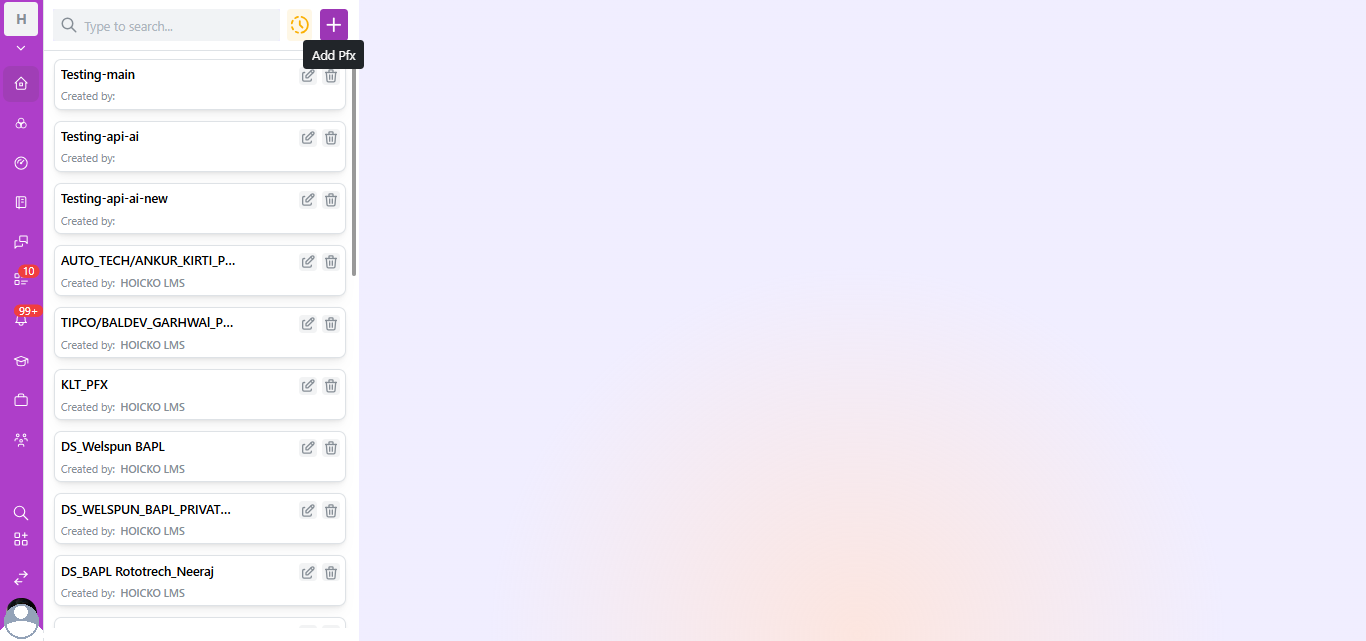
Understanding the "Create Your AI Signature" Form
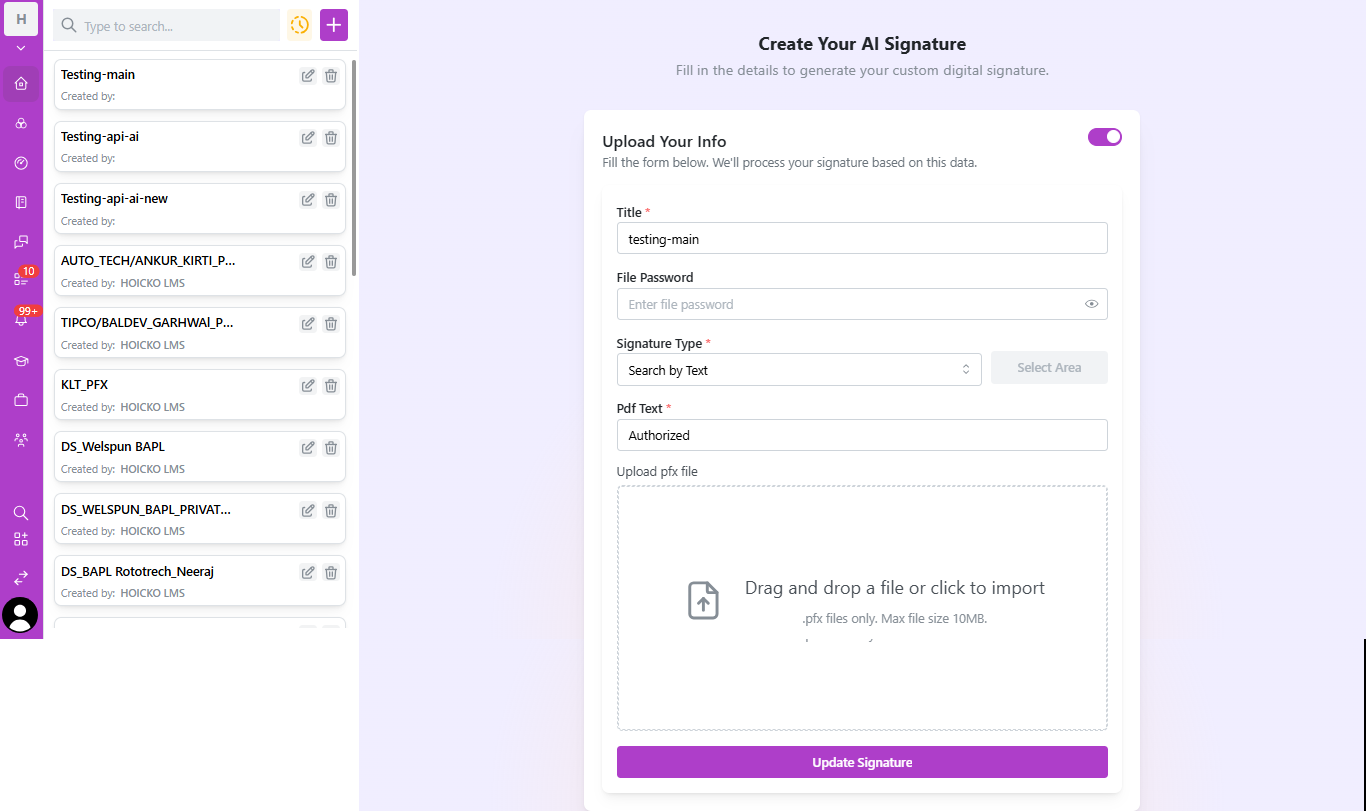
Hoicko's signature creation form is designed for accuracy and reusability. Here's what each field does:
| Field | Purpose |
|---|---|
| Title | Internal name for this signature profile (e.g., "testing-main"). Used to identify it in your Signatures list. |
| File Password | Optional password protecting your uploaded PFX certificate file. |
| Signature Type | Determines how Hoicko locates the placement area—"Search by Text" scans the PDF for matching text; other modes allow manual area selection. |
| PDF Text | The exact text string (e.g., "Authorized") Hoicko searches for in each PDF to auto-place the signature stamp. |
| Upload Pfx File | Your digital certificate (.pfx format, up to 10MB) that cryptographically signs the document. |
Step-by-Step: Creating a New Signature Profile
- From the Signatures list, click the purple "+" button (tooltip: "Add Pfx").
- In the Create Your AI Signature panel, toggle Upload Your Info ON.
- Enter a descriptive title—use a naming convention your team will recognize later (e.g., client name + purpose).
- If your PFX certificate is password-protected, enter it under File Password (use the eye icon to reveal/verify).
- Select your signature type. "Search by Text" is the most common—it auto-detects where to stamp the signature based on matching text.
- Enter the PDF text trigger phrase (commonly "Authorized," "Signature," or a department-specific keyword) that appears near where the signature should be placed.
- Drag and drop your .pfx file into the upload zone, or click to browse and import it.
- Click Update Signature to save the profile.
Best Practices for Signature Profile Setup
- Use consistent PDF text triggers across your document templates so one signature profile can serve multiple document types.
- Password-protect your PFX files and store the password in a secure password manager, not in plain text.
- Name profiles by use case, not by department alone—e.g., "Client_Contracts_2026" is more searchable than "Contracts."
Frequently Asked Questions
What is a PFX file, and why does Hoicko require it?
A PFX (Personal Information Exchange) file bundles your private key and digital certificate together. Hoicko uses it to cryptographically sign PDF documents so the signature is verifiable and tamper-evident—a legal requirement for compliant digital signatures.
What happens if I don't set a file password?
You can leave it blank if your PFX file itself isn't password-protected, but Hoicko strongly recommends certificate-level password protection for security.
Can I edit a signature profile after creating it?
Yes—use the pencil (edit) icon next to any profile on the Signatures list to update its title, PDF text trigger, or replace the PFX file.
Related content
Is this article helpful?
Help us improve our articles.