
Build Your Organizational Structure
Updated 8/14/20263 min read
Build your org structure by adding a top-level node, then adding sub-nodes underneath it for teams and positions, using the + icon next to each node until your hierarchy matches your company chart.
An accurate organizational structure is what makes every other HRMS feature — reporting lines, leave approvals, attendance visibility, department-level reporting — actually work correctly rather than just look correct on paper. Hoicko HRMS represents your company as a tree of nodes rather than a fixed set of fields, which means you're not forced into a rigid two-level "department, then employee" structure if your company doesn't actually work that way. You can go as broad or as granular as you need: a single "Development" department is a valid structure, and so is a five-level hierarchy running from Director down to individual position titles like "Backend Developer Lead."
This step tends to take longer than people expect the first time, mainly because it's the point where you translate your company's real-world reporting lines into the system rather than just following a wizard. It's worth taking the time to get this right, though, since a messy or incomplete org structure is one of the most common causes of confusion later — leave requests routing to the wrong manager, attendance reports grouped incorrectly, or new employees not showing up under the right team.
Step-by-step:
- From the HRMS dashboard, open Department Structure.
- Click Add New Node to create your first organizational unit, such as Director or HR—start at the top of your hierarchy and work downward.
- In the Enter the Node Name field, type the department or position name and click Create.
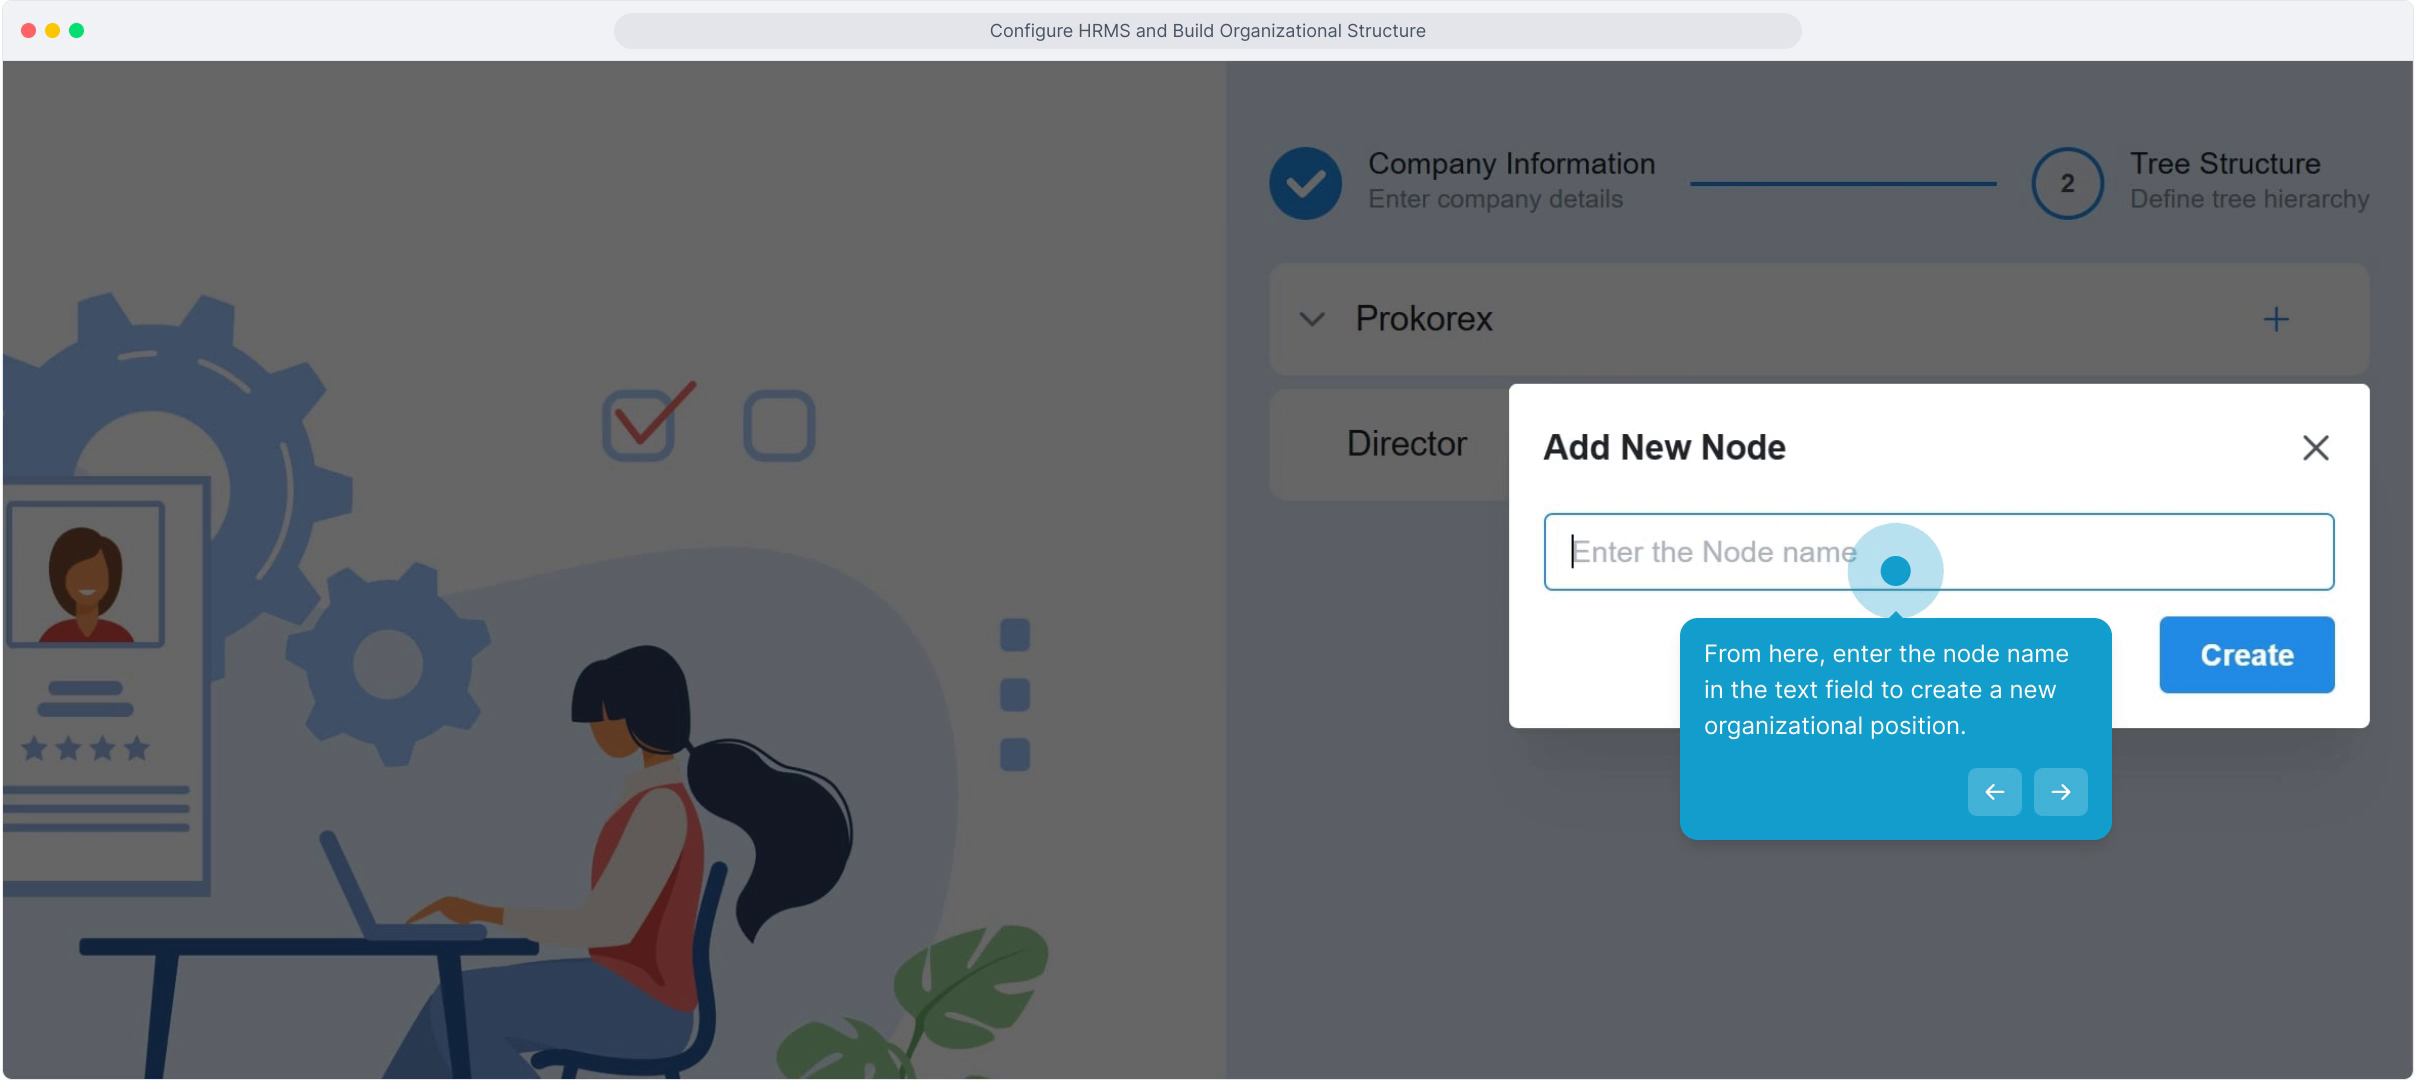
- Click the + icon next to any existing node to add a sub-node underneath it—for example, add Accounts, Admin, and Development under HR, one at a time.
- Continue nesting nodes to represent your real hierarchy as deeply as needed. A typical structure looks like: Director → HR → Accounts, Admin, Development; then Development → Front End Developer Lead, Backend Developer Lead, Server Engineer.
- Use the trash icon next to any node to remove it if you make a mistake—note this also removes anything nested beneath it, so double-check before deleting a node with sub-nodes.
- Once your organizational hierarchy is complete, click Enable HRMS to activate the human resource management system using this structure.
FAQ
Can I edit the structure after HRMS is already active?
Yes. Department structure remains editable at any time—add, rename, or delete nodes as your company grows or reorganizes, without needing to disable HRMS first.
How many levels of hierarchy can I create?
There's no practical limit. You can nest departments, sub-departments, and individual position titles as deep as your reporting structure genuinely requires—some companies stop at two levels, others go five or six deep.
Does the structure affect leave approvals?
Yes. Reporting relationships defined here are used elsewhere in HRMS—for example, when assigning a reporting manager to an employee for leave and attendance approvals, the dropdown pulls from the structure you've built here.
Should I build the whole structure before adding employees, or can I do both in parallel?
It's generally easier to build at least the top two or three levels of your structure first, since the Employee Personal Details form asks you to select a department during onboarding—having the structure ready means you're not creating departments on the fly mid-onboarding.
Related content
Is this article helpful?
Help us improve our articles.