
Integration
Updated 8/10/20263 min read
Hoicko's API Panel lets you connect a board to outside tools and systems, so data can flow in and out of Hoicko automatically. Instead of manually copying information between apps, developers can use the ready-made API documentation built into every board to read, write, update, and delete records directly.
Why use the API Panel?
Most teams use more than one tool — a website form, an internal system, another database, or a custom app. The API Panel gives you the exact endpoints, field IDs, and example values needed to connect Hoicko to those tools, without having to guess field names or write your own documentation.
Where to find the API Panel
- Open the column menu — Click the dropdown arrow (▾) on any column header on your board.
- Select API Panel — Choose API Panel from the menu — it sits alongside other board tools like Mirror, Workflow, Automation, and Manage Constraints.
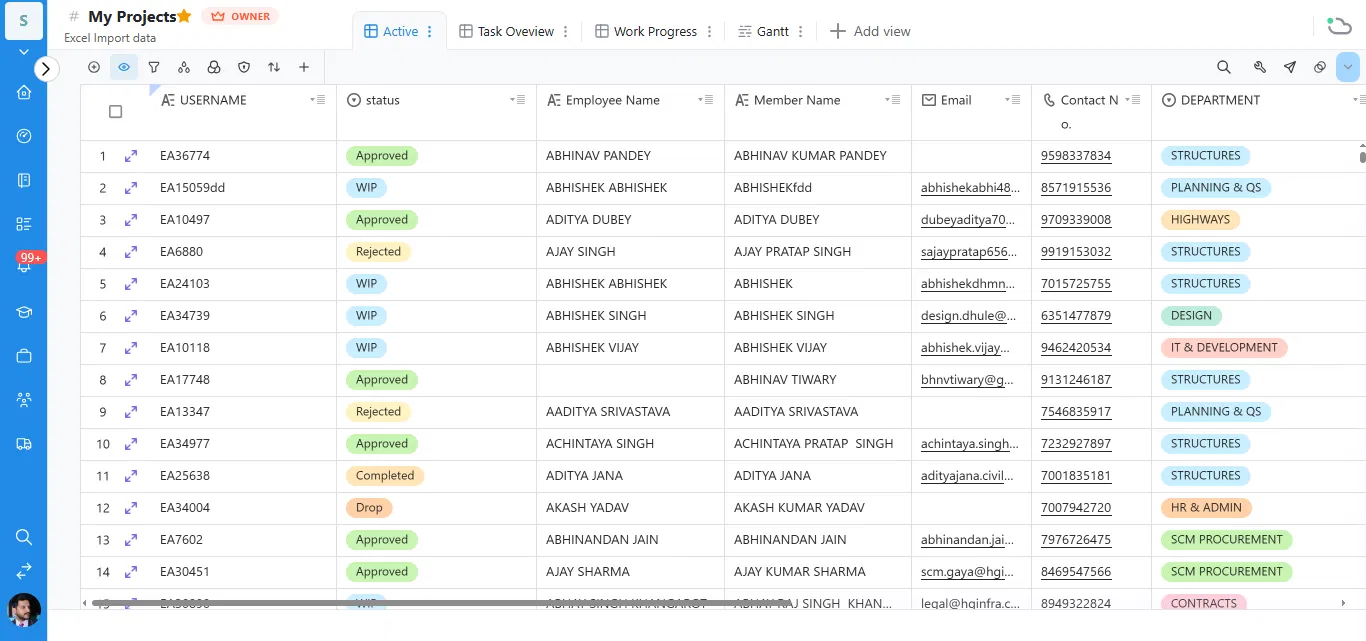
What's inside the API Panel
The API Panel opens as a side panel with everything a developer needs to connect this board through the API:
- Fields — a full list of every column on the board, with its Field ID, Field type (Long text, Select, Email, Phone, Member, etc.), a description of what the field returns, and an example value.
- Get records — the endpoint and format for reading existing data from the board.
- Add records — the endpoint and format for creating new records through the API.
- Update records — the endpoint and format for editing existing records.
- Delete records — the endpoint and format for removing records.
- Upload attachments — the endpoint for adding files to a record through the API.
- Show API Token / Use field ID — toggles at the top of the panel to reveal your API token or switch between using field names and field IDs in requests.
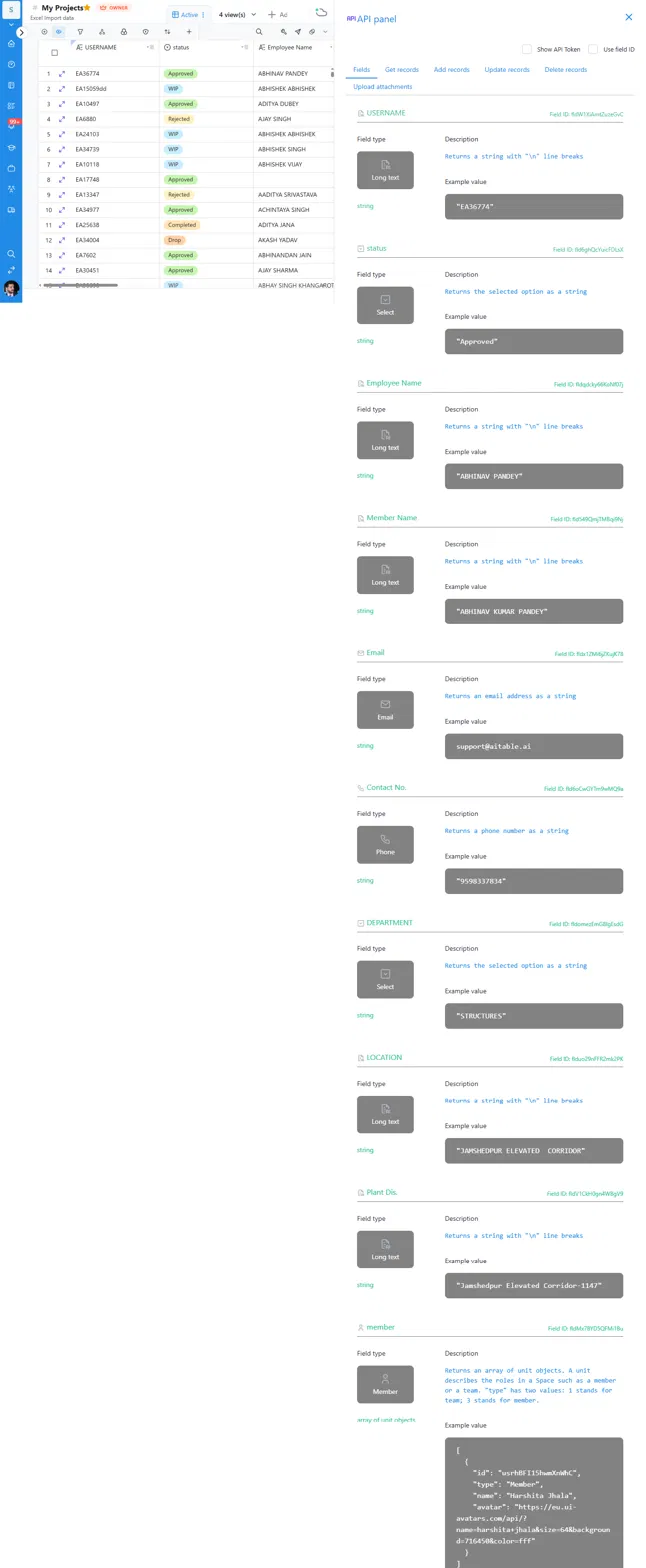
How field information helps your integration
Each field entry tells you exactly what to expect back from the API. For example, the status field is a Select type that returns the chosen option as a string, with "Approved" shown as its example value. The Email field returns a plain email address string, while the member field returns an array of unit objects, each with an id, type, name, and avatar — useful when your integration needs to know exactly who is assigned to a record.
Common use cases
- Syncing leads or records from a website form directly into a Hoicko board using Add records.
- Pulling live board data into an external dashboard or reporting tool using Get records.
- Updating a status automatically from another system (e.g. an ERP or CRM) using Update records.
- Cleaning up test or duplicate data through Delete records.
- Attaching documents generated by another system directly to a record using Upload attachments.
Tip: Turn on Use field ID if your integration reads column names dynamically or if you expect column titles to change later — Field IDs stay constant even if a column is renamed.
Frequently asked questions
Do I need to write my own API documentation to integrate with Hoicko?
No. The API Panel auto-generates documentation for every field on your board, including field types, descriptions, and example values, so you can start building an integration immediately.
What's the difference between using field name and field ID?
Field names are human-readable but can change if someone renames a column. Field IDs stay fixed, so integrations built on Field ID keep working even after a column is renamed.
Can I both read and write data through the API?
Yes. The panel provides separate endpoints for Get records, Add records, Update records, and Delete records, covering both reading and writing data.
Can I upload files to a record through the API?
Yes. The Upload attachments tab documents the endpoint used to add files to a specific record from an external system.
Is the API token visible by default?
No. The API token is hidden by default — check Show API Token at the top of the panel to reveal it when you need it for your integration.