
Automation
Updated 8/7/20263 min read
Hoicko automations let your boards handle repetitive work on their own. Instead of manually updating a status, sending a notification, or checking a sheet every day, you set up a rule once — Hoicko then watches your data 24/7 and reacts the moment something changes.
Why use automations?
Every board has routine tasks that don't really need a person doing them — reminding someone about a deadline, notifying a manager when a deal is won, or running a check on a fixed schedule. Automations take this repetitive work off your plate so your team can spend time on the work that actually matters.
Where to find Automation
Automation is available directly from any board. Open your board, click the dropdown arrow (▾) next to any column header, and select Automation from the menu.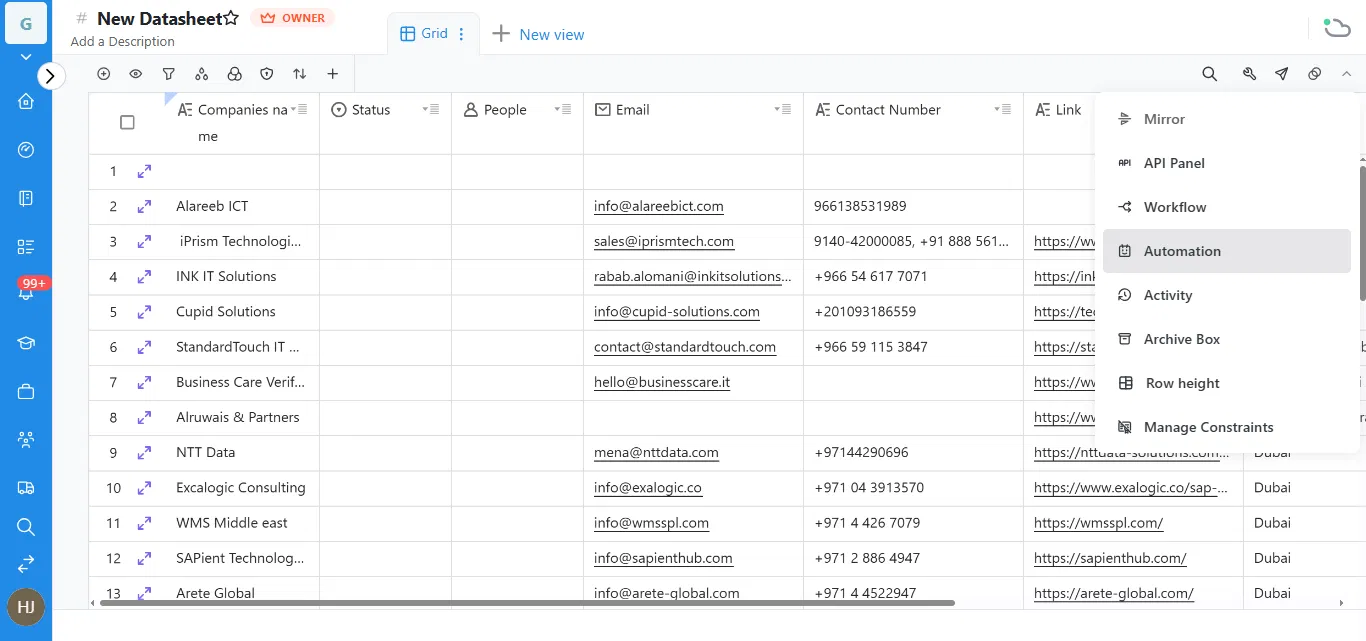
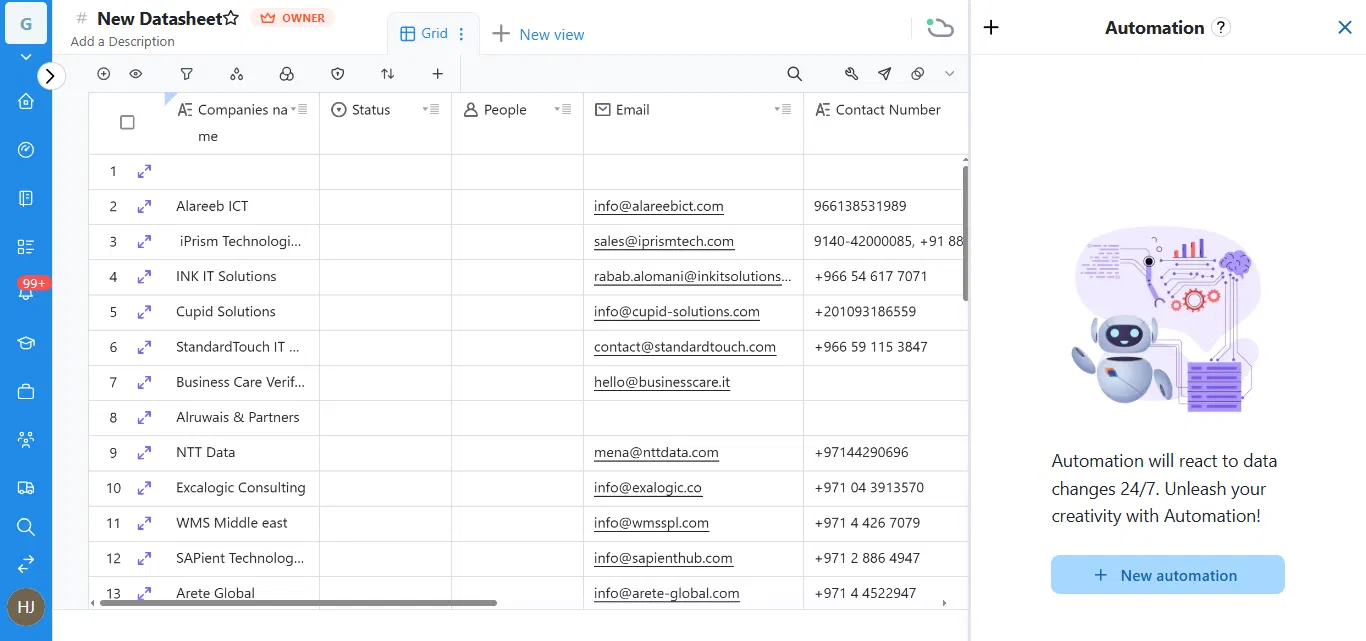
This opens the Automation panel on the right side of your screen. If you haven't created any automations yet, you'll see a short intro screen — this is your starting point for building your first rule.
Step 1: Choose your automation type
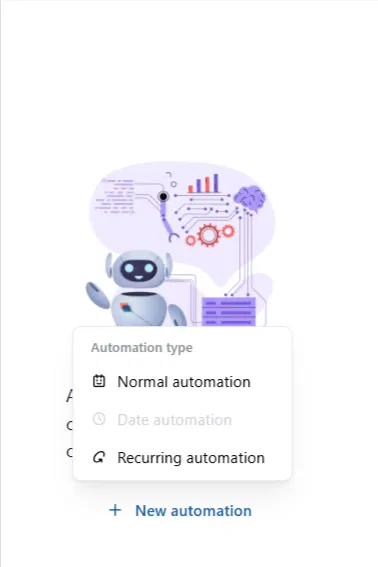
Click + New automation. Hoicko will ask what type of automation you want to build:
- Normal automation — reacts instantly when something changes on your board (e.g. a status update, a new item, a date being reached).
- Date automation — runs based on a specific date column on your board.
- Recurring automation — runs repeatedly on a fixed schedule, like every day or every week, regardless of what's happening on the board.
Step 2: Build the automation
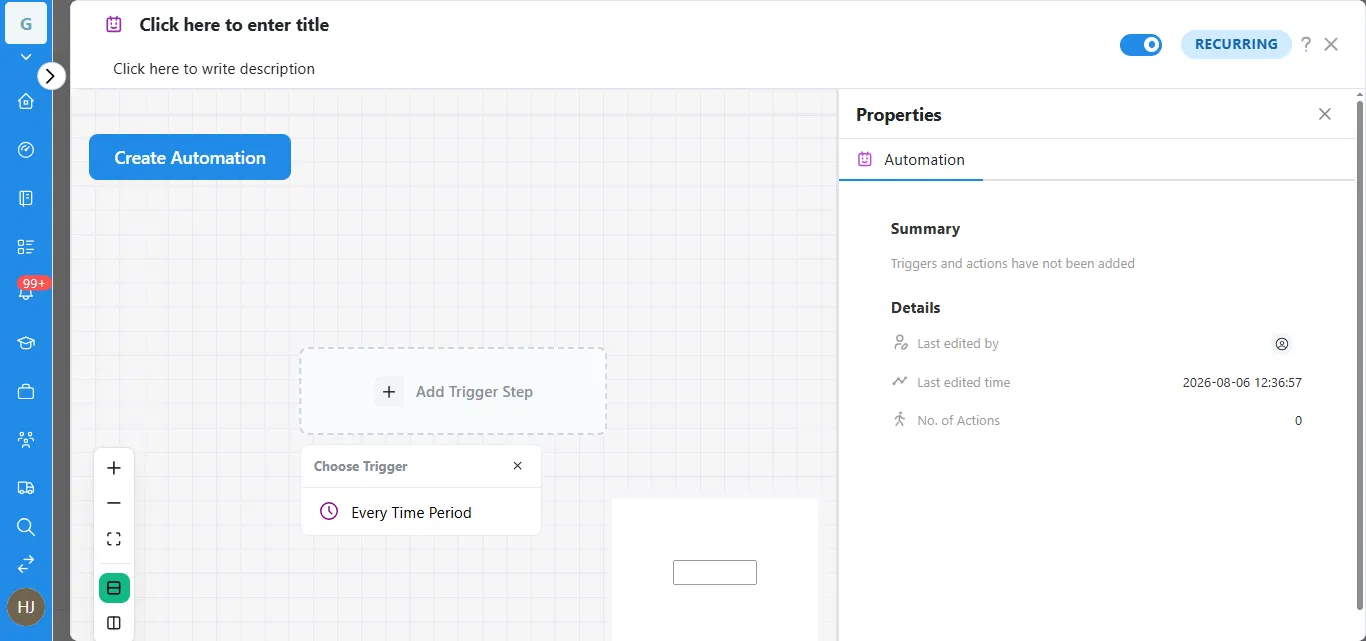
Once you pick a type, Hoicko opens the automation builder. This is where you connect a trigger (what starts the automation) to one or more actions (what happens next).
- Add a title — Click "Click here to enter title" at the top and name your automation so your team can recognize it later, e.g. "Notify sales when a deal closes."
- Add a trigger step — Click + Add Trigger Step in the middle of the canvas.
- Choose your trigger — Pick what should start the automation. For a recurring automation, this is usually Every Time Period — meaning it runs again and again after a set interval.
- Add your action(s) — After the trigger, add one or more actions — for example, notify a person, update a status, or move an item to another group.
- Save it — Click Create Automation in the top left to turn it on.
Understanding the Properties panel
On the right side of the builder, the Properties panel keeps track of your automation's setup:
- Summary — tells you whether triggers and actions have been added yet.
- Last edited by / Last edited time — shows who last changed the automation and when.
- No. of Actions — a running count of how many actions this automation performs.
Turning automations on or off
Every automation has a toggle switch at the top right of the builder. Turn it on to activate the automation, or off to pause it without deleting your setup. A RECURRING label appears next to the toggle when the automation is set to run on a repeating schedule.
Tip: Start with one trigger and one action to get comfortable, then build up to multi-step automations once you're familiar with how triggers and actions connect.
Common questions
Can I edit an automation after creating it?
Yes — open it from the Automation panel and update the trigger or actions at any time; changes apply immediately.
Can I turn an automation off without deleting it?
Yes, just use the toggle switch at the top of the automation builder.
Will a recurring automation keep running even if nothing changes on the board?
Yes — recurring automations run on their own schedule (Every Time Period), independent of board activity.
Is this article helpful?
Help us improve our articles.